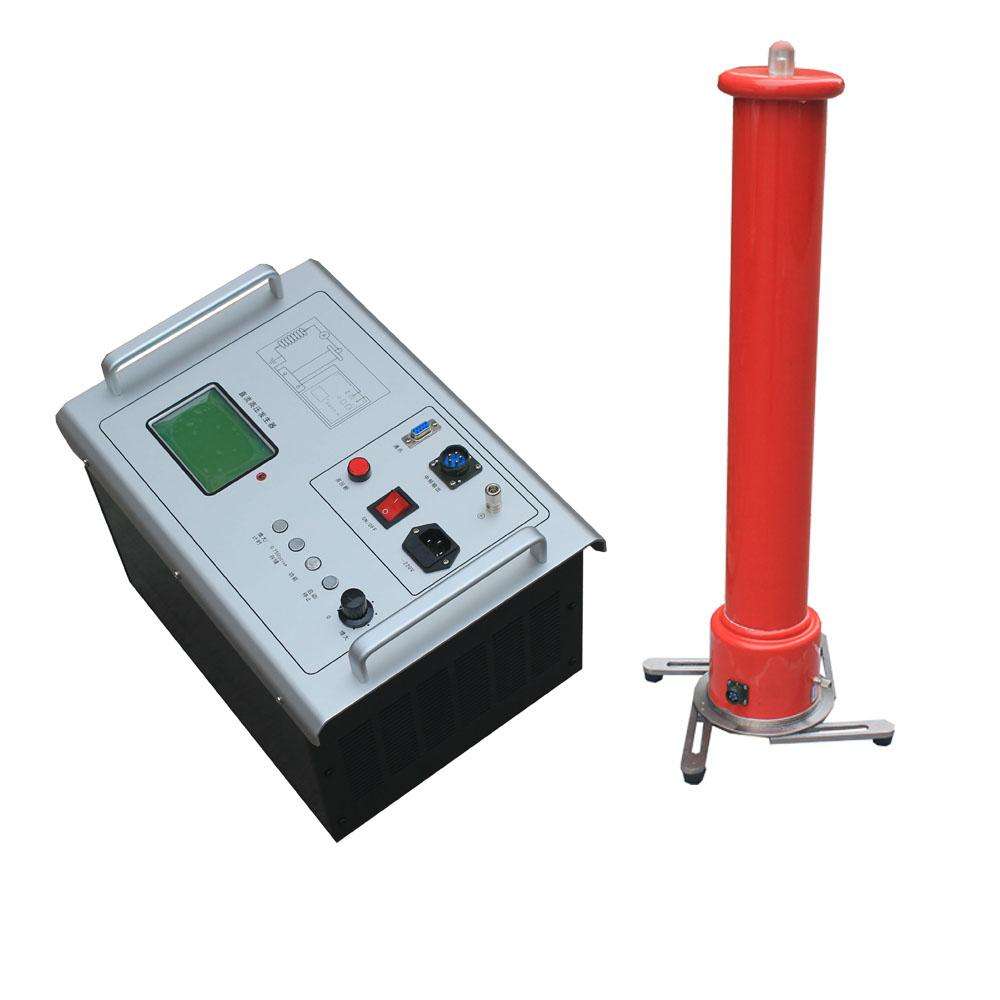

When conducting capacitive load tests, be sure to connect a current-limiting resistor.
1. Before use, check the tester for integrity; the connecting cables should have no open circuits or short circuits, and the equipment should have no cracks or other damage.
2. Place the control box and the voltage doubling cylinder in appropriate positions, connect the power cord, cable, and grounding wire respectively. The protective grounding wire, working grounding wire, and the grounding wire of the discharge rod should all be separately connected to the ground terminal of the test object (i.e., single-point grounding). It is strictly forbidden to connect grounding wires in series. For this purpose, use the DHV dedicated grounding wire.
3. Set the power switch to the OFF position and check that the voltage regulator potentiometer is at zero. The overvoltage protection setting is generally 1.1 times the test voltage.
4. Perform a no-load voltage rise to verify the sensitivity of the overvoltage protection setting.
5. Turn on the power switch; the red light will illuminate, indicating that the power is connected.
6. Press the green button; the green light will illuminate, indicating that the high voltage is connected.
7. Adjust the voltage regulator potentiometer smoothly in a clockwise direction; the output voltage will start from zero and increase. After reaching the required voltage, record the ammeter reading at the specified time and check the control box and high-voltage output cable for any abnormalities or sounds.
8. To reduce the voltage, return the voltage regulator potentiometer to zero, then press the red button to cut off the high voltage and turn off the power switch.
9. Perform leakage and DC withstand voltage tests on the test object. After conducting a check test to confirm that the tester is normal, you can begin the leakage and DC withstand voltage tests on the test object. Connect the test object and grounding wire properly, and after verifying no errors, turn on the power.
10. Increase the voltage to the required voltage or current. The voltage rise rate should be about 3-5 kV per second. For large capacitive test objects, monitor the ammeter to ensure the charging current does not exceed the maximum charging current of the tester. For small capacitive test objects such as zinc oxide arresters and magnetic blow arresters, first increase to 95% of the required voltage (current), then slowly and carefully increase to the required voltage (current). Then read the voltage (current) value from the digital display. If a 0.75UDC-1mA measurement is required for zinc oxide arresters, first increase to the UDC1mA voltage value, then press the yellow button; the voltage will immediately drop to 75% of the original and maintain this state. At this point, the current can be read. After the measurement, turn the voltage regulator potentiometer counterclockwise back to zero and press the green button. To increase the voltage again, press the red button.
If necessary, use an external high-voltage divider to compare with the voltage on the control box.
11. After the test, reduce the voltage and turn off the power.
12. Several measurement methods
1) For general measurement, after connecting the wires, first leave the wire connecting the test object suspended, increase to the test voltage, and read the corona and stray current I during the no-load test. Then connect the test object, increase to the test voltage, and read the total current I1; the leakage current of the test object: Io = I1 - I'